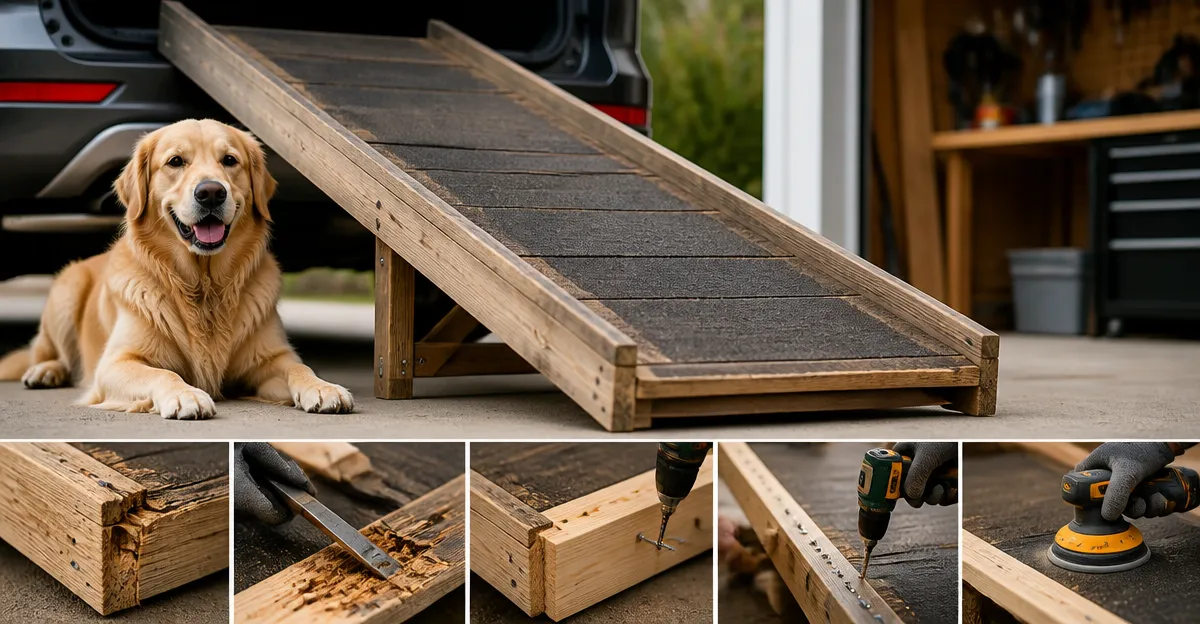
How to Repair a Wooden Dog Ramp: A Step‑by‑Step DIY Guide to Fix, Reinforce & Restore
Introduction
Pet owners often discover that their wooden dog ramps develop cracks, loose joints, or surface wear after months of use. A well‑maintained ramp can prevent joint strain and protect vulnerable breeds from injury, making repair a valuable investment. This guide will teach the reader how to assess damage, select appropriate materials, and execute repairs that restore structural integrity. By following these instructions, one will extend the ramp's lifespan while ensuring safety for senior or injured dogs.
What You'll Need
- Wood glue (PVA or polyurethane)
- Clamps (bar or pipe)
- Sandpaper (120‑grit and 220‑grit)
- Wood filler or epoxy putty
- Non‑slip carpet or rubber matting
- Screwdriver set and replacement wood screws
- Measuring tape and pencil
- Safety glasses and dust mask
Optional tools include a power drill, a small circular saw for trimming, and a wood planer for smoothing large imperfections.
Step 1: Inspect the Ramp Thoroughly
The first major step is to examine the ramp for structural weaknesses, paying particular attention to joints, legs, and the surface layer. Look for visible cracks, splintered wood, loose screws, and areas where the non‑slip covering has detached. Use a flashlight to reveal hidden damage beneath the carpeted surface. Document each issue with notes or photos so that the repair process can be organized efficiently.
Step 2: Gather Materials and Prepare the Workspace
After inspection, collect all required tools and materials in a well‑ventilated area with a sturdy workbench. Lay down a drop cloth to protect flooring and to contain dust generated by sanding. Put on safety glasses and a dust mask before beginning any sanding or cutting operations. Having everything within reach reduces interruptions and maintains focus on precise workmanship.
Step 3: Disassemble Damaged Sections
To access the internal framework, remove any removable side rails, carpet panels, or detachable legs. Use a screwdriver to extract screws that hold the ramp together, keeping them in a labeled container for re‑use. If the ramp includes modular components, separate them carefully to avoid further damage. Disassembly also allows you to test each piece for stability and to identify hidden cracks that were not visible during the initial inspection.
Step 4: Repair Cracks and Splits
Apply a high‑quality wood glue to all cracked joints, ensuring the adhesive penetrates the full depth of the fissure. For larger gaps, first fill the void with wood filler or epoxy putty, smoothing it with a putty knife. Clamp the glued sections firmly for at least 30 minutes, or follow the manufacturer’s recommended curing time for maximum bond strength. Once the glue has set, sand the repaired area with 120‑grit sandpaper to remove excess glue and to create a uniform surface.
Step 5: Reinforce Joints and Structural Elements
Weak joints benefit from additional mechanical reinforcement. Replace any stripped or corroded screws with new wood screws of comparable length and diameter. For extra stability, consider installing metal corner brackets on the ramp’s legs, a technique used in the KUVETO 74in Wooden Dog Ramp. This product exemplifies solid‑wood construction, featuring handcrafted solid wood and sturdy joinery that withstands daily use. At a price of $158.95 and a rating of 4.6/5.0 from 299 reviews, the KUVETO ramp demonstrates the durability that reinforced joints can achieve. By mimicking its construction methods—such as using longer screws and adding discreet brackets—one can significantly increase the repaired ramp’s load‑bearing capacity.
Step 6: Replace or Restore the Non‑Slip Surface
A safe ramp must provide reliable traction. If the original carpeted covering is worn or detached, remove it completely and clean the wood surface. Cut a new piece of non‑slip carpet or rubber mat to match the ramp’s dimensions, securing it with a strong adhesive designed for wood and fabric. The Gardner Pet 2‑in‑1 Dog Stairs & Ramp includes a removable TPU waterproof cover that offers both durability and easy cleaning; at $39.96 with a 4.6/5.0 rating from 1,959 reviews, it illustrates a practical solution for replaceable surfaces. Using a similar waterproof, anti‑slip material on the repaired ramp will protect the wood from moisture and extend the lifespan of the traction layer.
Step 7: Reassemble and Align All Components
With joints reinforced and the surface refreshed, begin reassembling the ramp in the reverse order of disassembly. Align each leg and rail precisely, checking that the ramp sits level on the floor and that the top platform aligns flush with the intended furniture surface. Tighten all screws securely, but avoid over‑tightening, which can strip the wood fibers. Perform a final sanding with 220‑grit sandpaper to smooth any rough edges and to ensure a comfortable transition for the dog’s paws.
Step 8: Test Stability and Safety
Before allowing the dog to use the ramp, conduct a thorough stability test. Apply pressure to the top of the ramp, rocking it gently side to side to confirm that there is no wobble. Place a moderate weight—such as a 30‑pound sandbag—on the ramp to simulate the dog’s load and observe any flexing. For a benchmark of stability, compare the repaired ramp to the Pawaboo Foldable Adjustable Small Dog Ramp, which features widened legs, anti‑slip pads, and a foldable design that remains steady under similar weight. Priced at $67.89 with a 4.4/5.0 rating from 133 reviews, the Pawaboo ramp demonstrates the level of steadiness that a well‑repaired wooden ramp should achieve. Once the ramp passes these tests, allow the dog to ascend slowly, monitoring for any signs of instability.
Tips & Pro Tips
- Work in a climate‑controlled environment; extreme humidity can affect glue curing times.
- Use a moisture meter to ensure the wood is dry before applying glue or filler.
- When cutting new non‑slip material, leave a ¼‑inch overhang to wrap around the edges for a secure fit.
- Apply a thin coat of polyurethane finish to the wood after sanding to protect against future wear.
- Regularly inspect the ramp after each use for early signs of wear, allowing prompt maintenance.
Troubleshooting
Problem: Screws continue to loosen after reassembly.
Solution: Replace standard wood screws with stainless‑steel screws and add a thread‑locking adhesive to prevent vibration‑induced loosening.
Problem: The non‑slip surface peels after a few weeks.
Solution: Ensure the wood surface is completely clean and dry before applying adhesive, and consider using a marine‑grade epoxy for superior bonding.
Conclusion
Repairing a wooden dog ramp requires careful inspection, appropriate materials, and methodical execution of each step. By reinforcing joints, restoring the non‑slip surface, and testing stability, one can achieve a ramp that rivals the durability of premium commercial models. The techniques outlined in this guide empower pet owners to extend the useful life of their ramps while maintaining safety for beloved companions. With confidence in the repaired structure, one can continue to provide easy access for senior or injured dogs without incurring the cost of a brand‑new ramp.
Products Mentioned in This Guide
Frequently Asked Questions
How can I tell if my wooden dog ramp needs repair?
Look for cracks, loose joints, wobbling, or a worn surface that makes the ramp feel unstable or unsafe for your dog.
What type of glue is best for fixing a wooden dog ramp?
Use a waterproof wood glue such as PVA or polyurethane for a strong, lasting bond.
How do I reinforce a cracked joint on a dog ramp?
Apply wood glue, insert wood filler or epoxy putty, clamp the joint tightly, and let it cure before sanding.
What non‑slip material should I add to the ramp surface?
Attach a non‑slip carpet or rubber matting to the top of the ramp to improve traction for your dog.
How can I prevent future damage to my wooden dog ramp?
Regularly inspect for wear, tighten screws, keep the ramp clean and dry, and reapply a protective sealant or finish annually.