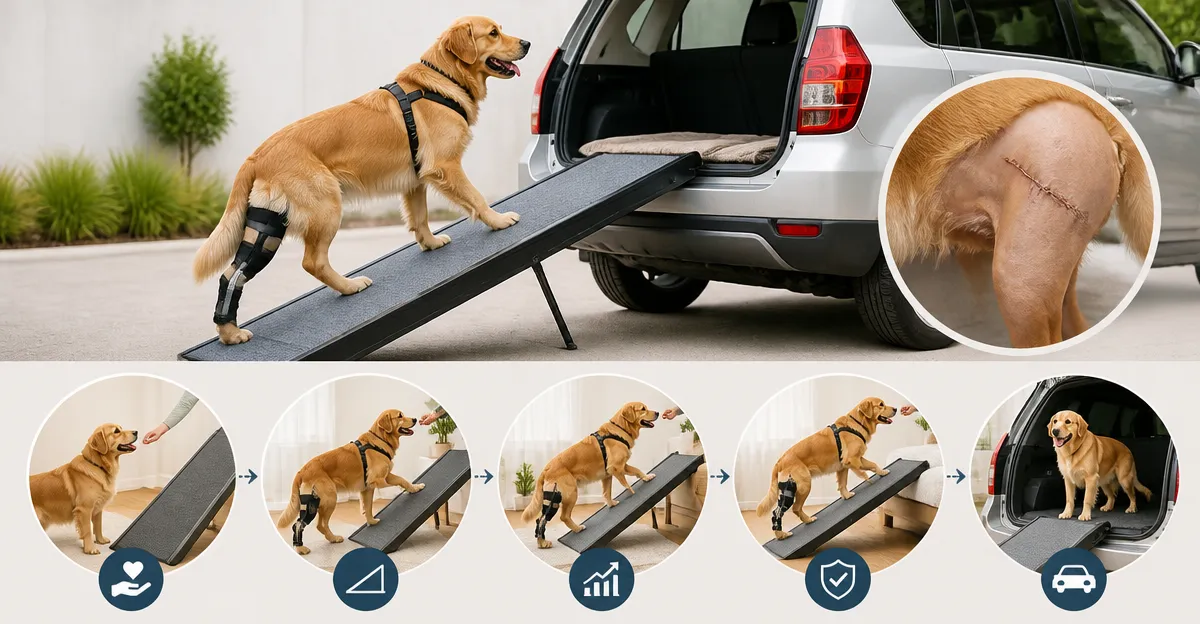
How to Train Your Dog to Use a Ramp After TPLO Surgery: A Step‑by‑Step Post‑Op Rehab Guide
Introduction
This guide explains how to re‑introduce a canine patient to a ramp after tibial plateau leveling osteotomy (TPLO) surgery. It outlines a systematic approach that reduces joint stress, encourages confidence, and supports a swift return to normal activity. The reader will learn how to prepare the environment, use positive reinforcement, and adjust the ramp as healing progresses. The information is valuable because proper ramp training can prevent setbacks and protect the surgical repair.
What You’ll Need
- A sturdy, non‑slip ramp appropriate for the dog’s size and weight.
- Adjustable height support for indoor furniture if the dog needs a bed or couch ramp.
- Treats, clicker, or other reward devices for positive reinforcement.
- Cleaning supplies to keep the ramp surface free of debris.
- Optional: a portable travel ramp for outings.
The following products have been selected from Amazon because they meet the safety and durability criteria required for post‑TPLO rehabilitation.
Step 1: Prepare a Safe Environment
Begin by selecting a flat, well‑lit area where the ramp will be placed. The surface should be free of obstacles, and the ramp should sit on a stable floor to prevent wobbling. It is advisable to use a ramp with an internal load‑bearing crossbar for added stability. The HerCcreta Dog Car Ramp 63" provides high‑grade aluminum construction, a 270 lb capacity, and a non‑slip carpet surface, making it ideal for this initial stage. At a price of $79.97 and a rating of 4.3 stars from 1,977 reviews, it offers a reliable foundation for the dog’s first attempts.
Place the ramp so that the gentle angle (approximately 10–12 degrees) aligns with the vehicle’s rear opening or the step you intend to replace. Secure the safety rope to the vehicle or floor to prevent movement. Ensure the rubber‑like top surface remains clean; a quick wipe with a damp cloth will maintain traction.
Step 2: Introduce the Ramp Gradually
Allow the dog to explore the ramp at its own pace before any weight‑bearing is required. Position the dog on a soft surface at the base of the ramp and let it sniff and step onto the first segment. Use a calm voice and gentle hand guidance, but do not force the animal. The HerCcreta Dog Car Ramp 63" is foldable into a compact size, which facilitates repositioning during the exploration phase.
Reward each successful step with a high‑value treat and a click from a clicker if one is used. This creates a positive association with the ramp. Repeat the short sessions three to five times per day, keeping each session under five minutes to avoid fatigue.
Step 3: Use Positive Reinforcement to Build Confidence
Once the dog is comfortable standing on the ramp, encourage it to move forward a few inches. Offer a treat at the top of the ramp and praise verbally when the dog reaches the reward. If the dog hesitates, gently guide the front paws forward while maintaining a calm tone. The key is consistency; the dog should understand that the ramp leads to a pleasant outcome.
Maintain a steady schedule of reinforcement for at least one week before increasing the distance. This approach mirrors the successful experiences reported by owners of the PetSafe Happy Ride Folding Dog Ramp, where owners noted rapid adoption after brief positive training sessions.
Step 4: Monitor Weight‑Bearing Progress
During the first two weeks, limit the dog’s weight on the ramp to short, slow walks. Observe the gait for any limping, swelling, or signs of pain. If any adverse signs appear, reduce the duration and consult the veterinarian. The ramp’s non‑slip carpet surface absorbs impact, which is beneficial for a healing joint.
For indoor use, such as reaching a bed or couch, the Veehoo Adjustable Dog Bed Ramp offers five height settings ranging from 12 to 20 inches. Its metal frame supports up to 130 lb, and the corduroy non‑slip fabric provides additional traction. Priced at $69.99 with a 4.4‑star rating from 97 reviews, it is a practical tool for low‑impact indoor training.
Step 5: Adjust Angle and Length as Healing Advances
Around the third to fourth week, the veterinarian may permit increased activity. At this stage, a longer ramp reduces the incline angle, further protecting the surgical site. The HerCcreta Extra‑Long Dog Car Ramp 71" extends to 71 inches and widens to 20 inches, providing a gentler slope for larger or heavier dogs. It supports up to 270 lb, weighs 20 lb, and folds into a compact 19.7 × 19.2 × 6‑inch package for storage. At $119.98 and a 4.3‑star rating, it is an excellent upgrade for dogs that require a less steep approach.
Replace the 63‑inch ramp with the 71‑inch model once the dog demonstrates confidence on the shorter version. Ensure the safety rope and buckles are secured, and observe the dog’s reaction to the new angle. Continue to reward progress and monitor for any signs of discomfort.
Step 6: Travel and Outdoor Use
When the dog is cleared for travel, a lightweight, portable ramp simplifies loading into a vehicle. The PetSafe Happy Ride Folding Dog Ramp folds in half, weighs only 10 lb, and features high‑traction treads, side rails, and rubber feet for stability on uneven ground. It supports up to 150 lb and is priced at $59.99 with a 4.1‑star rating from 15,040 reviews, making it a cost‑effective travel solution.
Before each trip, inspect the ramp for loose bolts or worn treads. Position the ramp against the vehicle’s rear door, secure the safety latch, and guide the dog onto the ramp using the same reward system established during indoor training. This consistency helps the dog transfer learned behavior to a new environment.
Tips & Pro Tips
- Always keep the ramp surface clean; debris can reduce traction and increase the risk of slipping.
- Use a padded handle when carrying the ramp to avoid strain on the caregiver’s hands.
- Gradually increase the length of each session by no more than 10 % per day to prevent over‑exertion.
- If the dog shows hesitation, lower the ramp angle temporarily by placing a sturdy board underneath the lower section.
- Consult the veterinarian before making any changes to the rehabilitation plan.
Troubleshooting
Problem: Dog refuses to step onto the ramp.
Solution: Place a favorite toy or treat at the top of the ramp, and use a leash to gently guide the front paws forward. Reduce the angle by propping the lower end on a low stool.
Problem: Ramp wobbles during use.
Solution: Ensure the safety rope is tightly fastened and that the rubber feet are in full contact with the floor. Consider using the wider 20‑inch version of the HerCcreta ramp for increased stability.
Conclusion
Training a dog to use a ramp after TPLO surgery requires patience, consistent reinforcement, and the right equipment. By following the step‑by‑step process outlined above, caregivers can minimize joint stress, encourage confidence, and support a smooth return to normal activity. The recommended ramps provide durability, non‑slip surfaces, and adjustable angles that align with the evolving needs of a recovering dog. Continued monitoring and adherence to veterinary guidance will ensure the best possible outcome.
Products Mentioned in This Guide
Frequently Asked Questions
When should I start introducing a ramp to my dog after TPLO surgery?
Begin ramp training as soon as your vet clears weight‑bearing, usually within the first week, using short, supervised sessions.
How can I make the ramp safe and non‑slippery for my recovering dog?
Choose a sturdy ramp with a textured, rubberized surface and keep it clean of water, food, or debris before each use.
What type of positive reinforcement works best during ramp training?
Use high‑value treats, a clicker, or verbal praise immediately when the dog steps onto or off the ramp to encourage repeat behavior.
How often should my dog use the ramp during the rehabilitation phase?
Start with 3–5 short trips per day and gradually increase frequency as the incision heals and the dog gains confidence.
Can I use a portable travel ramp for outings after TPLO surgery?
Yes, a lightweight, fold‑able ramp with a non‑slip surface lets your dog safely navigate cars, stairs, or public places while still protecting the surgical site.