Introduction
Pet owners frequently encounter the challenge of providing senior or mobility‑impaired dogs with safe access to elevated furniture. A curved staircase dog ramp offers a gentle incline that follows the natural line of a stairwell, reducing joint strain and preventing accidental falls. This guide will teach the reader how to measure, select, customize, and securely install a curved ramp that fits a typical residential staircase. By following each step, one can create a durable solution that enhances the pet's independence while protecting the home’s interior.
The instructions are written for an intermediate DIY audience; basic carpentry skills and common hand tools are assumed. Although the guide references specific products, the reader can complete the project with alternative materials if desired. The emphasis remains on safety, stability, and long‑term durability.
What You’ll Need
- Measuring tape, carpenter’s level, and pencil for layout.
- Power drill with appropriate screwdriver bits.
- Wood screws (3‑in. to 4‑in. length) and wall anchors suitable for the stair material.
- Non‑slip carpet or rubber padding for the ramp surface.
- Optional: PetSafe Wooden Bed Ramp – a sturdy wooden ramp with a high‑traction carpet cover (price $97.46, rating 4.4/5 from 8,809 reviews).
- Optional: SweetBin Adjustable Dog Ramp – a fold‑able ramp offering four height settings (price $59.99, rating 4.4/5 from 500 reviews).
- Optional: Tsukiko Foldable Dog Ramp – a 64‑inch long ramp with six height adjustments and a load capacity of 220 lb (price $139.99, rating 4.6/5 from 471 reviews).
- Optional: SweetBin High Traction Dog Ramp – an extra‑wide ramp with six height settings and a non‑slip carpet surface (price $71.99, rating 4.3/5 from 893 reviews).
Step 1: Measure and Plan the Curve
The first task is to determine the exact length and curvature required to bridge the stairwell without creating an abrupt incline. Use a measuring tape to record the vertical rise from the floor to the landing and the horizontal run along the stair tread. Record these dimensions in a notebook; they will guide the selection of a pre‑made ramp or the dimensions of a custom‑cut piece.
Next, sketch a simple side view of the staircase, indicating the desired ramp profile. A gentle curve with a slope between 15 and 18 degrees typically feels comfortable for most dogs. If the staircase has a landing, incorporate a short flat platform to give the pet a moment of rest before the next step.
When planning, consider the weight capacity of the ramp. For dogs up to 120 lb, the PetSafe Wooden Bed Ramp provides ample strength; for larger breeds, the Tsukiko Foldable Dog Ramp supports up to 220 lb. Choose a ramp that meets or exceeds the pet’s weight to ensure safety.
Step 2: Choose the Appropriate Ramp
Based on the measurements, select a ramp that matches the required length, height, and load capacity. The PetSafe Wooden Bed Ramp offers a solid wood construction with a high‑traction carpet surface, making it ideal for curved installations where stability is paramount. Its dimensions of 70" L × 16" W × 25" H allow it to span moderate stair runs while supporting pets up to 120 lb.
If the staircase requires multiple height adjustments, the SweetBin Adjustable Dog Ramp provides four preset heights ranging from 12" to 20". This flexibility is useful when the stair rise varies along the curve. The ramp folds for storage, which can be advantageous in smaller homes.
For very long or high staircases, the Tsukiko Foldable Dog Ramp delivers a 64" length and six height settings up to 30". Its sturdy wooden frame and heavy‑duty carpet ensure that even large dogs feel secure while navigating a pronounced curve.
When the primary concern is maximum traction on smooth surfaces such as polished wood or tile, the SweetBin High Traction Dog Ramp offers an extra‑wide deck with a striped, wear‑resistant carpet and integrated crossbars. This design minimizes slipping, which is especially important on a curved ramp where the pet may encounter subtle shifts in angle.
Step 3: Prepare the Staircase Surface
Before attaching any hardware, clean the stair treads and landing area to remove dust, grease, or loose debris. A clean surface improves screw grip and prevents future loosening. If the stair material is glossy, lightly sand the attachment points to create a rougher texture for better adhesion.
Mark the intended location of the ramp on the stair risers using a pencil. Align the marks so that the ramp’s base sits flush with the floor and the top aligns with the landing edge. Use a carpenter’s level to verify that the marked line follows a consistent incline.
For curved installations, it may be necessary to cut a shallow groove into the stair tread to allow the ramp to sit lower and maintain a smooth transition. A circular saw with a fine blade can achieve this; however, the user must wear safety goggles and follow all tool safety guidelines.
Step 4: Cut and Shape the Ramp (If Customizing)
If a pre‑made ramp does not perfectly match the curvature, one can trim the edges to create a custom fit. Measure the excess length on both ends and mark a straight line where the cut will be made. Use a fine‑toothed saw to achieve a clean edge that will not splinter.
When shaping a curve, a jigsaw with a fine blade can be employed to follow the sketched profile. Clamp the ramp securely to a workbench before cutting to prevent movement. After cutting, sand the edges smooth to avoid sharp corners that could injure the pet.
Apply a thin coat of non‑slip adhesive to the underside of the ramp where it will contact the stair surface. This adhesive works in conjunction with the screws to provide additional grip, especially on curved sections where the angle changes frequently.
Step 5: Install Support Brackets
Support brackets distribute the ramp’s weight across multiple points, reducing stress on any single screw. For a curved ramp, install at least three brackets: one near the base, one at the midpoint, and one near the top. Use brackets that are rated for the ramp’s load capacity; the metal brackets included with the SweetBin Adjustable Dog Ramp are suitable for up to 60 lb, while the PetSafe ramp’s built‑in support beams can handle 120 lb.
Position each bracket on the stair tread and secure it with wood screws. Pre‑drill pilot holes to prevent the wood from splitting. Tighten the screws until the bracket is firmly seated but avoid overtightening, which could strip the hole.
Once the brackets are in place, position the ramp on top and verify that it rests evenly on each bracket. Adjust the bracket positions if necessary to achieve a smooth, continuous curve.
Step 6: Secure the Ramp to the Staircase
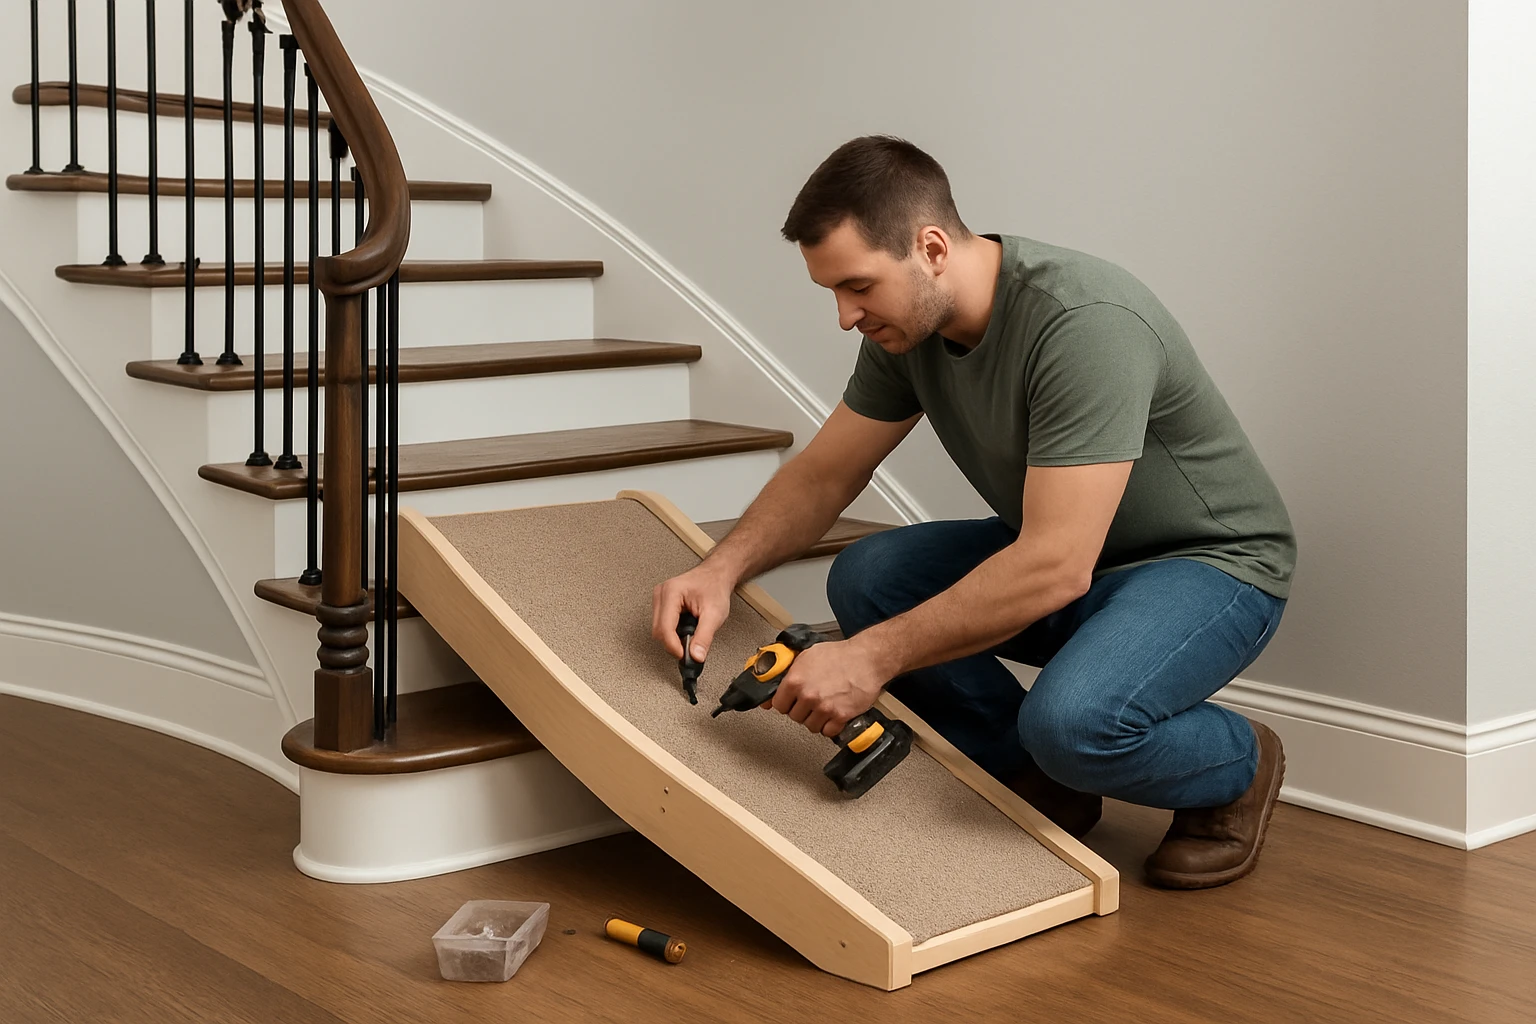
With the ramp positioned, drill pilot holes through the ramp’s pre‑drilled holes into the stair treads. Use a drill bit slightly smaller than the screw diameter to ensure a tight fit. Insert wood screws through the ramp and into the stair, tightening them with a screwdriver or drill driver.
For added stability on a curved ramp, use at least two screws per bracket. The SweetBin High Traction Dog Ramp recommends using 3‑in. screws for a secure connection; follow the same guideline for other ramps. If the stair material is drywall or plaster, insert wall anchors before driving the screws to prevent pull‑out.
After all screws are tightened, inspect the ramp for any wobble. Gently apply pressure at multiple points along the ramp; it should feel solid with no movement. If any flex is detected, reinforce the area with additional brackets or longer screws.
Step 7: Add Non‑Slip Surface and Finishing Touches
Even though the recommended ramps already feature high‑traction carpet, applying an extra layer of non‑slip material can increase safety on a curved surface. Cut a piece of anti‑slip tape or rubber mat to match the ramp’s dimensions and adhere it using a strong adhesive.
Consider adding side rails or a low fence if the pet is nervous about heights. The PetSafe Wooden Bed Ramp includes optional side rails that can be attached with small brackets. Side rails provide a sense of security and prevent the pet from sliding off the side of the ramp.
Finally, test the ramp with the pet. Encourage the animal to approach the base, using treats or a favorite toy as motivation. Observe the pet’s gait; a smooth, confident ascent indicates that the ramp is correctly installed.
Tips & Pro Tips
- Measure twice, cut once. Accurate measurements reduce the need for re‑work.
- Use a level at each stage of installation to maintain a consistent incline.
- If the staircase has a landing, incorporate a short flat platform to give the pet a rest point.
- Apply a waterproof sealant to any cut wood edges if the ramp will be used in humid environments.
- Regularly check the screws and brackets for looseness, especially during the first few weeks of use.
- For pets with severe arthritis, consider adding a plush cushion on top of the carpet for extra comfort.
Troubleshooting
Problem: The ramp feels wobbly after installation.
Solution: Verify that all brackets are firmly attached to the stair treads. Add additional brackets or replace short screws with longer ones that reach deeper into the stair structure.
Problem: The pet refuses to use the ramp.
Solution: Use positive reinforcement such as treats or a favorite toy at the top of the ramp. Ensure the ramp surface is clean and free of odors that might deter the pet.
Problem: The carpet surface is slipping on polished wood.
Solution: Apply a thin layer of non‑slip adhesive beneath the carpet or attach a rubber mat underneath the ramp.
Conclusion
Installing a curved staircase dog ramp enhances a pet’s mobility while protecting both the animal and the home. By measuring accurately, selecting a suitable ramp, and securing it with proper hardware, one can create a safe, durable pathway that blends seamlessly with existing décor. The recommended products—PetSafe Wooden Bed Ramp, SweetBin Adjustable Dog Ramp, Tsukiko Foldable Dog Ramp, and SweetBin High Traction Dog Ramp—provide reliable options for a variety of stair configurations and pet sizes. With careful installation and periodic maintenance, the ramp will serve the pet for many years, fostering independence and reducing joint stress.
Products Mentioned in This Guide
Frequently Asked Questions
How do I measure my stairs to ensure a curved dog ramp fits correctly?
Measure the total rise, run, and width of the staircase, then use those dimensions to calculate the ramp’s radius and length, allowing a gentle 10‑12° incline.
What materials are best for a durable, non‑slip curved dog ramp?
Choose pressure‑treated or hardwood for the frame, cover it with a non‑slip carpet or rubber mat, and reinforce with metal brackets for added strength.
Can I install a curved ramp without modifying my existing stairs?
Yes, attach the ramp to the wall or landing using sturdy brackets and wall anchors, keeping the original stairs untouched.
How do I secure the ramp to prevent wobbling or shifting?
Fasten the ramp’s base to the floor with wood screws and anchor the top to the wall studs, then add diagonal braces for extra stability.
What maintenance is required to keep the ramp safe for my dog?
Regularly check screws and brackets for tightness, clean the surface to remove debris, and replace worn non‑slip covering as needed.