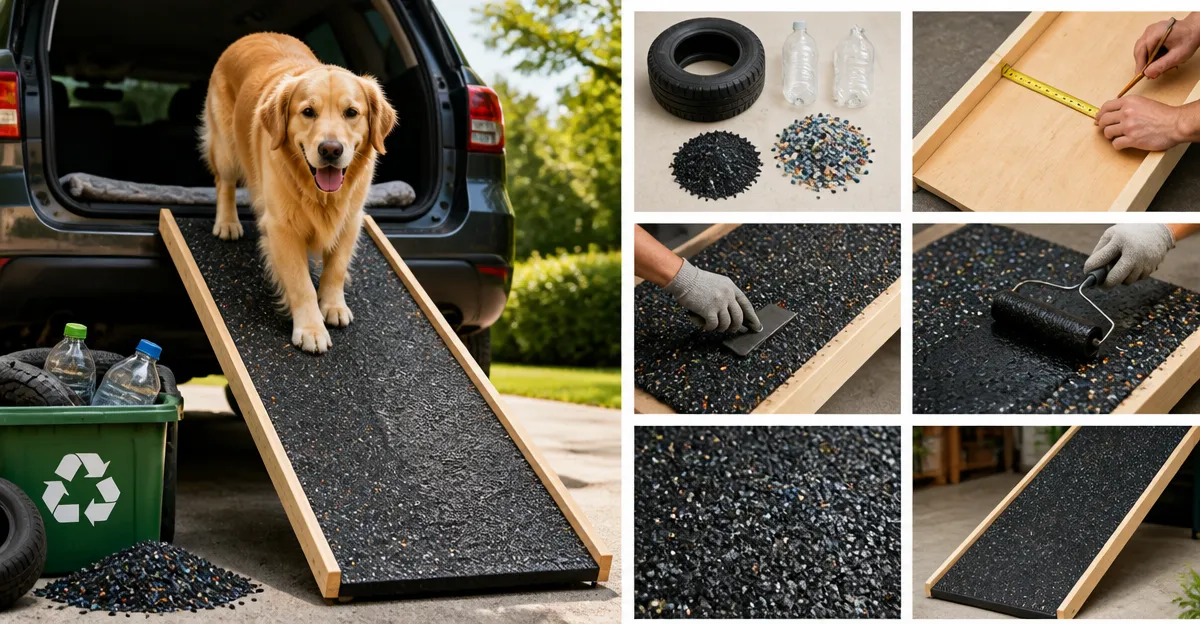
How to Make a Non‑Slip Dog Ramp Surface from Recycled Materials: A Step‑by‑Step DIY Guide
This guide will teach the reader how to transform ordinary recycled items into a safe, non‑slip ramp for a dog. The reader will learn how to select a sturdy base, apply a traction surface, and secure the finished ramp for long‑term use. The instructions are written for an intermediate audience that is comfortable with basic tools and measurements. By following the steps, one can provide a comfortable access solution for senior, injured, or small dogs while reducing waste.
What You’ll Need
The following materials and tools are recommended. Many of them can be sourced from household leftovers, but a few specialized items improve durability and safety.
- Recycled wooden pallet planks or sturdy cardboard sheets for the ramp base.
- High‑traction material such as PVC looped fibers, non‑slip rubber, or foam padding.
- Adhesive suitable for wood and fabric (e.g., heavy‑duty spray adhesive).
- Measuring tape, pencil, and a hand saw or utility knife.
- Sandpaper, clamps, and zip ties for securing edges.
- Optional: GAOYITK Dog Ramp – a pre‑made folding ramp that provides a ready‑made frame and non‑slip surface.
- Optional: Veehoo Adjustable Dog Ramp – offers adjustable height and a metal frame for added stability.
- Optional: MEJYJEM Dog Stairs – provides high‑density foam padding that can be repurposed as a non‑slip layer.
- Optional: PRIORPET Wooden Dog Ramp – a birchwood ramp that can be cut to size for a solid wooden base.
Step 1: Choose and Prepare the Base Ramp
The first step is to select a base that can support the dog’s weight without flexing. Recycled wooden pallet planks are ideal because they are strong, inexpensive, and readily available. If a pallet is not available, the GAOYITK Dog Ramp can serve as a pre‑assembled frame; it supports up to 250 lb, measures 71 × 19.7 in., and features a non‑slip surface already applied. The ramp’s extra length creates a gentle slope that reduces joint stress, making it an excellent foundation for a DIY surface.
Measure the desired length and width based on the vehicle trunk, couch, or bed height. Mark the cut lines on the pallet planks and use a hand saw to trim them to the exact dimensions. Sand the cut edges to remove splinters and ensure a smooth finish.
For a wooden base, the PRIORPET Wooden Dog Ramp provides a birchwood construction that is both sturdy and aesthetically pleasing. It supports up to 200 lb and folds flat for storage, which can be useful if space is limited. The hardwood surface accepts adhesive well, allowing a custom non‑slip layer to be applied.
Once the base is cut and sanded, set it aside on a flat work surface. Ensure the ramp sits at a 30‑to‑35‑degree angle when placed against the target height; this angle balances safety and ease of use for most dogs.
Step 2: Select a Non‑Slip Material
A non‑slip surface is essential to prevent the dog from slipping, especially on wet or polished floors. The GAOYITK ramp already includes a PVC looped‑fiber surface that offers excellent traction. If building from scratch, the Veehoo Adjustable Dog Ramp uses a corduroy non‑slip fabric that can be cut into strips and adhered to the base. This fabric is comfortable for the paws and remains effective when wet.
Another option is the foam padding from the MEJYJEM Dog Stairs. The stairs feature high‑density sponge that cushions the joints and can be repurposed as a thin layer on the ramp surface. The foam is covered with a removable, machine‑washable non‑slip corduroy, providing both comfort and traction.
When selecting the material, consider the dog’s size and any sensitivities. PVC looped fibers are durable for heavy dogs, while corduroy fabric offers a softer feel for small or senior pets. Cut the material to match the ramp dimensions, leaving a half‑inch overlap on each side to allow secure attachment.
Lay the cut pieces on the base to verify fit before proceeding to adhesive application.
Step 3: Apply Adhesive and Secure the Surface
Use a heavy‑duty spray adhesive that works on both wood and fabric. Apply the adhesive evenly to the ramp surface, following the manufacturer’s instructions for drying time. Press the non‑slip material onto the adhesive, starting at one end and smoothing toward the opposite end to avoid air bubbles.
Clamp the material in place with temporary clamps or secure it with zip ties along the edges. The clamps should be removed after the adhesive has cured, typically 24 hours. For additional security, the GAOYITK Dog Ramp utilizes double‑tightened screws that prevent wobbling; mimicking this method by adding a few small screws along the underside can increase rigidity.
If the ramp will be exposed to outdoor conditions, consider a waterproof sealant applied around the perimeter of the non‑slip layer. This sealant protects the adhesive from moisture and extends the ramp’s lifespan.
Allow the adhesive to cure fully before proceeding to the next step.
Step 4: Add Edge Guard and Finishing Touches
Sharp edges can cause injury to a dog’s paws. Sand any rough edges on the wooden base and apply a thin strip of rubber edge guard or extra non‑slip material along the sides. The PRIORPET Wooden Dog Ramp includes a rubberized surface that naturally protects the edges; a similar rubber strip can be purchased separately if needed.
Attach the edge guard with small screws or strong adhesive, ensuring it does not protrude beyond the ramp surface. This step also prevents the ramp from slipping sideways when the dog steps on it.
Finally, test the ramp by applying gentle pressure along its length. The ramp should feel solid with no flex. Adjust any loose sections before allowing the dog to use it.
Optional: Install the Veehoo Adjustable Dog Ramp as a height‑adjustable support underneath the DIY surface for taller furniture. Its five height settings (12‑20 in.) allow precise alignment with beds, couches, or vehicle trunks.
Step 5: Test the Ramp with Your Dog
Introduce the ramp to the dog in a calm environment. Use treats and a gentle voice to encourage the dog to walk up and down. Observe the dog’s gait; a confident stride indicates that the non‑slip surface is effective.
If the dog hesitates, consider adding a short ramp extension or increasing the angle slightly. The GAOYITK Dog Ramp has a 71‑inch length that creates a gentle slope; replicating this length in the DIY version helps reduce anxiety for senior pets.
Monitor the ramp for any signs of wear after the first few uses. Replace the non‑slip material if it becomes frayed, and re‑apply adhesive as necessary.
Once the dog uses the ramp confidently, the project is complete.
Tips & Pro Tips
- Use reclaimed hardwood rather than soft pine for a longer‑lasting base.
- Apply the non‑slip material in a well‑ventilated area to avoid inhaling adhesive fumes.
- When cutting foam or fabric, use a rotary cutter for clean edges.
- Secure the ramp to the vehicle or furniture with straps to prevent movement during use.
- For outdoor ramps, add a UV‑resistant coating to protect the surface from sun damage.
Troubleshooting
Problem: The ramp feels slippery when wet.
Solution: Apply an additional layer of non‑slip rubber tape on the high‑traffic zones. The rubber surface on the PRIORPET Wooden Dog Ramp demonstrates how rubber can improve traction.
Problem: The non‑slip material lifts after a few days.
Solution: Ensure the adhesive is compatible with both surfaces and allow full curing time. Adding a few small screws along the underside, as used in the GAOYITK ramp, can provide extra mechanical bonding.
Problem: The ramp is too steep for a senior dog.
Solution: Extend the ramp length using additional pallet planks or select the Veehoo Adjustable Dog Ramp for height adjustment.
Conclusion
This guide has demonstrated how to construct a durable, non‑slip dog ramp from recycled materials while integrating high‑quality commercial products where they add value. By selecting a sturdy base, applying a traction‑enhancing surface, and securing edges, one creates a safe access solution for dogs of any size or ability. The recommended products—GAOYITK Dog Ramp, Veehoo Adjustable Dog Ramp, MEJYJEM Dog Stairs, and PRIORPET Wooden Dog Ramp—provide proven performance and can streamline the building process. Implement the steps, follow the tips, and enjoy the confidence of knowing your pet can reach high places safely.
Products Mentioned in This Guide
Frequently Asked Questions
What recycled materials are suitable for building the ramp base?
Sturdy wooden pallet planks or thick cardboard sheets are ideal recycled options for a strong ramp base.
How do I attach a non‑slip surface to the ramp?
Cut the high‑traction material to size, apply heavy‑duty spray adhesive, and press it firmly onto the base, then smooth out any bubbles.
Which adhesive works best for bonding wood and fabric‑type traction material?
A heavy‑duty spray adhesive designed for wood and fabric provides a strong, lasting bond.
What steps ensure the ramp stays securely attached and safe for my dog?
Clamp the base while the adhesive cures, reinforce edges with zip ties or screws, and sand any rough spots before use.
Is this DIY non‑slip ramp appropriate for senior or injured dogs?
Yes, the added traction and gentle incline make it safe and comfortable for older, injured, or small dogs.